#cpanel wizard
Explore tagged Tumblr posts
Visit Tumblr Blog
Explore Tumblr blogs with no restrictions, modern design and the best experience.
Last Seen Tumblr Blogs


Fun Fact
Tumblr.com is the 103rd most visited website in the world.
Text
FoodTiger Nulled Script 3.6.0

Unlock the Power of FoodTiger Nulled Script for Your Food Delivery Business Are you ready to revolutionize your food delivery startup with a robust and feature-rich platform? Look no further than the FoodTiger Nulled Script—a powerful solution designed to streamline operations, support multiple restaurants, and deliver exceptional user experience. This script is perfect for entrepreneurs and developers looking for a fast, reliable, and customizable tool to kick-start their food ordering service without the hefty price tag. What is FoodTiger Nulled Script? The FoodTiger Nulled Script is a premium food delivery software that has been unlocked for free access. Originally developed as a high-end solution for managing food delivery businesses, this nulled version offers you all the premium features—without any restrictions. With its intuitive interface and powerful admin dashboard, you can manage restaurants, orders, and customers with ease. It’s an excellent alternative for startups looking to save money while still accessing top-tier software. Technical Specifications Platform: Laravel PHP Framework Database: MySQL Languages: Fully multilingual with built-in translation support Responsive: 100% mobile-friendly layout Third-Party Integration: Supports Stripe, PayPal, and more Outstanding Features & Benefits Multi-Restaurant System: Perfect for marketplaces—host multiple restaurants under one roof. Real-Time Order Tracking: Let your users track their orders from kitchen to doorstep. Advanced Admin Panel: Manage restaurants, menus, discounts, and delivery zones effortlessly. Modern UI/UX: Sleek and intuitive design that enhances customer satisfaction. Contactless Delivery: Built-in support for safe, contactless food delivery methods. Why Choose FoodTiger Nulled Script? Choosing the FoodTiger gives you access to premium tools without licensing fees. You get the flexibility to customize every part of the system, from UI layouts to backend logic. It’s ideal for freelancers, startups, and developers who want full control over their food delivery platforms. Say goodbye to limitations and hello to a world of possibilities—all without spending a dime. Common Use Cases Launching a multi-vendor food delivery app in your local area Building a white-label solution for restaurant chains Starting a commission-based food ordering marketplace Testing new delivery models and logistics solutions with zero upfront cost How to Install FoodTiger Nulled Script Download the FoodTiger Nulled Script from our website. Upload the files to your server using FTP or cPanel. Set file permissions and create a new MySQL database. Run the installer by accessing your domain in a web browser. Follow the setup wizard and enter your database credentials. Login to the admin panel and start configuring your platform. Frequently Asked Questions (FAQs) Is it legal to use the FoodTiger Nulled Script? While using nulled scripts may violate the original developer’s terms, many users opt for them to test or build proof-of-concept platforms. We encourage using it responsibly and considering licensing options if you plan to scale. Can I customize the FoodTiger Nulled Script? Absolutely. The script is fully open-source and built on Laravel, allowing deep customization of features, design, and functionalities. Is this version secure for live deployments? The FoodTiger Nulled Script includes the same core security features as the licensed version. However, always perform your own audits and use secure hosting practices for best results. Where can I download the FoodTiger Nulled Script? You can download the latest version directly from our website and get started today with no hidden costs or restrictions. Start Building Your Delivery Empire Today Whether you’re a developer building a food delivery app or an entrepreneur aiming to create the next big thing in local delivery services, the FoodTiger is your gateway to fast, affordable, and scalable success. Don’t miss the opportunity to harness this powerful tool for free.
Check out our other valuable downloads like betheme nulled and explore even more resources to enhance your web projects. Need additional themes and scripts? Visit our trusted partner for more tools like betheme nulled to power up your development journey.
0 notes
Text
SPARK App Review – Host unlimited Websites and Domains
Welcome to my SPARK App Review. In a world where technology evolves rapidly, website creation becomes easy when there are tools that help streamline the process. For businesses, developers, and hobbyists alike this is a game changer. Learn more about SPARK App, the new generation of AI website building and management suite, designed to get you into the world of website creation and management without much sweat.

SPARK App comes with features like full cloud hosting, cPanel access and an impressive suite of 99 AI tools like the all new Sora AI which will change the way we define the building of and maintaining our presence online. In this detailed review of the SPARK App, we tease out the most important features, benefits, pricing, pros, cons, and will help you determine if the SPARK App is the right choice for your website creation needs.
What Is SPARK App?nbsp;
SPARK App is an artificial intelligence website builder software which intends to meet the needs of individuals and business entities who wish to launch corporate-like websites with ease. Including 99 AI templates and the recently launched Sora AI, the app automates tasks, which previously were challenging to deal with, like design, coding, content creation, and SEO.

Hosting is divided into full cloud which includes cPanel functionality and all necessary options for controlling websites and blogs. Its full package approach is focused on mileage and utility, which means that Freelancer may just become of favorite platform of entrepreneurs, marketers and developers.
SPARK App Review: Overview of Product
Product Creator: Mike & Radu
Product Name: SPARK
Launch Date: 2025-Jan-20
Launch Time: 11:00 EST
Front-End Price: $17 (One-time payment)
Official Site: Click Here To Visit Official Salespage
Product Type: Tools and Software
Support: Effective Response
Discount: Get The Best Discount Right Here!
Recommended: Highly Recommended
Bonuses: YES, Huge Bonuses
Skill Level Required: All Levels
Discount Coupon: Use Code “SPARK6” To Get $6 Off (Full Funnel)
Refund: YES, 30 Days Money-Back Guarantee
SPARK App Review: About Authors

SPARK is brought to you by the masterminds Mike and Radu. Mike, with his extensive experience in software development and user interface design, has made SPARK both intuitive and powerful. Radu, an expert in the ultimate AI-Powered Website Creation Suite, has integrated advanced features that effortlessly drive traffic and maximize sales.
His interest in technology that changes the game goes beyond this release. There are great items in his collection, such as Prestige, Flicker, Nucleus, ProfitList, ProfitCodex, ProfitWPH, ProfitStays, ProfitShopper, ProfitSpark, ProfitSoci, ProfitSGE, ProfitMarc, ProfitClass, ProfitCom, ProfitReply AI, ProfitAudio, ProfitTok, ProfitTV, ProfitTurbo, ProfitChat, GPT eBook Pack, and many others.
SPARK App Review: Key Features of SPARK App
Host unlimited websites and domains on our cloud hosting servers for a low onetime fee
99 premium paid Ais included (Sora AI, ChatGPT omni PRO, Google Gemini Ultra Advanced, DallE 3 HD, Whisper AI, Midjourney Mega, Leonardo PRO, Copilot Pro, and many more)
Get faster loading websites than ever before with 100% uptime
60-Second Setup Wizard Lets You Quickly Get Your Sites Live On Our Servers
Create incredible pages, funnels and affiliate websites with drag & drop ease using the built-in website builder
Dedicated server cluster with built-in DDOS protection, 24.7 backups and hacker-proof security
Unlimited Free end-to-end SSL encryption protects you and your websites
Pay once, use forever hosting on unlimited domains or sites
Unlimited bandwidth with NO monthly or yearly fee
Host all of your website’s data including files, images and graphics
100% Newbie Friendly with point-and-click user interface
Your own personalized business email accounts
Legal compliance (GDPR, ADA, etc) built-in
Free one-click WordPress installer with next-generation control panel
24/7 support from marketing gurus
Never lose your precious data: malware protection is built right in
No technical skills or experience needed
SPARK App Review: How Does It Work?
Create & Host All Your Sites and Domains in Just 3 Simple Steps with 99 Premium Paid Ais Integrated inside Your cPanel (and with ZERO monthly fees)
Step #1: Enter Your Domain Name inside SPARK Cloud Hosting (you can add unlimited domains and websites)
Step #2: Use Our 60-Second AI Setup Wizard To Create Your Dream Website From Inside CPanel (Actual Premium Paid Ais like ChatGPT PRO build you entire sites, write unlimited content, create amazing HD videos and images and even code SAAS apps for you)
Step #3: Use Our Drag & Drop Website Builder To Design Gorgeous Pages, Sales Funnels And Websites (Create better-looking and faster-loading sites than ever before, access and share from anywhere in the world with unlimited bandwidth, 100% uptime and end-to-end malware protection)
SPARK App Review: Benefits of SPARK App
Fully-Responsive Designs That Look Amazing on All Devices!
Create Unlimited Websites Without Additional Costs!
Built-In eCom Features for Launching Online Stores!
Nothing to Configure – It’s All Done-For-You!
Get Real-Time Feedback and Suggestions from AI to Perfect Your Website!
Never Seen Before AI Tools for Custom Designs, Animations, Branding, and MORE!
Start Your Very Own Website Design and Hosting Business!
This Software Has Been Fully Tested By Us Personally and Is Proven To Work!
Full Commercial Rights – Offer This Incredible Service To Clients!
24/7 Support from Marketing Experts!
Perfect For Affiliates, eCom Sellers, Offline…Everyone!
100% Newbie-Friendly, Easy-To-Use Software!
Never Been Done Before!

SPARK App Review: Why You Must Grab SPARK
Build entire affiliate websites on Spark hosting
Write unlimited unique content for those websites
Code any apps that you can host inside Spark
Create amazing HD videos and HOST them as well with our Spark video player
Generate graphics and images
Turn any text into human sounding speech
Create music that can top the Billboard charts
Publish NY Times bestselling books
Manage your social media accounts
Clone any voice and setup talking avatars
Get you #1 rankings via SEO and backlinks
Run live chatbots for support & sales
Even create entire Hollywood-polish movies using Sora AI
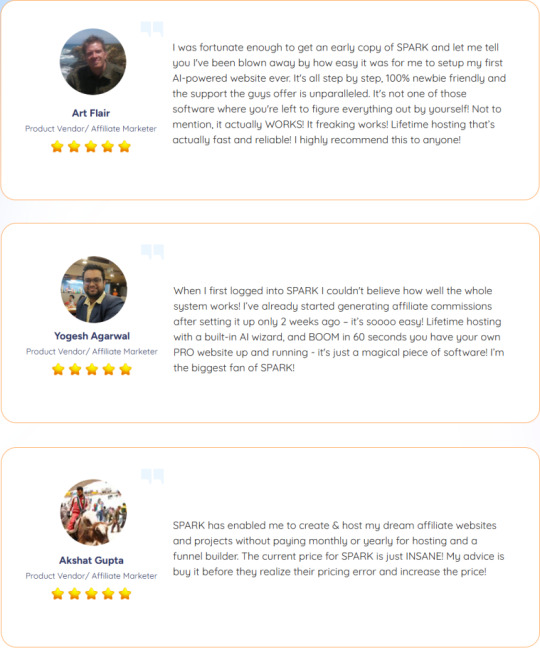
Verify Users Say About SPARK App
SPARK App Review: Who Should Use It?
Affiliate Marketer
Business Owners
Coaches/Trainers
Product Creators
SAAS Owners
Video Marketer
E-Com Seller
Webinar/Seminar Presenter
Freelancers
Agency Owners
Newbies
Digital Marketer
Website Owners
And Many Others
SPARK App Review: OTO’s And Pricing
Add My Bundle Coupon Code “SPARKS30″ – For 30% Off Any Funnel OTO Below
Front End Price: SPARK Regular ($17)
OTO1: SPARK PRO ($32.90)
OTO2: SPARK Enterprise ($62)
OTO3: SPARK DFY ($39)
OTO4: SPARK Reseller ($197)
OTO5: SPARK IMX Bundle ($97)
SPARK App Review: Pros and Cons
No tool is perfect, and understanding its Pros and Cons is essential. Here’s a breakdown:
Pros:
Time-Saving: AI automation reduces the time spent on manual tasks.
Ease of Use: A user-friendly interface makes it accessible to beginners.
Comprehensive Features: From hosting to design, SPARK App covers all bases.
Scalability: Suitable for small projects and large enterprises alike.
Cost-Effective: Eliminates the need for multiple tools, saving money in the long run.
Cons:
Requires a one-time investment
To use this product, you must have internet access.
Nothing wrong with it, it works perfectly!
My Own Customized Exclusive VIP Bonus Bundle
***How To Claim These Bonuses***
Step #1:
Complete your purchase of the SPARK App: My Special Unique Bonus Bundle will be visible on your access page as an Affiliate Bonus Button on WarriorPlus immediately after purchase. And before ending my honest SPARK App Review, I told you that I would give you my very own unique PFTSES formula for Free.
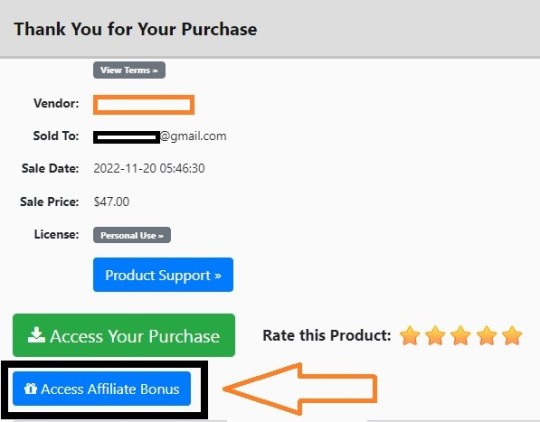
Step #2:
Send the proof of purchase to my e-mail “[email protected]” (Then I’ll manually Deliver it for you in 24 HOURS).
Frequently Asked Questions (FAQ’s)
Q. Is SPARK cloud-based?
Yes, SPARK is a cloud-based hosting solution easy to access from anywhere. Works with Mac, PC and mobile.
Q. Does SPARK cost a monthly fee?
When you act now, you’re getting one-time access to SPARK without EVER having to pay a monthly fee 🙂
Q. Are others using SPARK already?
Yes – we have more than 19,000 happy customers already. Some of their feedback is being represented on this very page above.
Q. Do I need any tech skills or experience to make this work?
NO – SPARK is seamless and 100% newbie friendly.
Q. Are there any restrictions?
You are able to upload, create and host an unlimited number of websites. You can add unlimited domains, enjoy unlimited bandwidth and unlimited SSL licenses. You can create unlimited email accounts. There is a 10GB total storage limit across all your domains, but no limit on any individual domain. If you need more storage you can easily upgrade – all upgrades for early adopters are also a one-time fee. Pay once, enjoy forever.
Q. Is Support & Training Included?
Absolutely. By purchasing today you can get instant access to the training portal and the 24/7 support desk.
My Recommendation
SPARK App is a game changing platform in website building and management. For industries cross users, its combination full cloud winning, cPanel access and 99 AI sections including the talented Sora AI, constitutes a comprehensive handle. It’s expensive for the advanced plans, has a small learning curve, but if you break it down, the benefits are many.
If you’re doing any kind of website building, SPARK is one of those services you should be considering via one of the various ways listed below. Its robust feature set and intuitive interface means you’ll be all set to churn out the best professional websites that matter so much in today’s competitive online environment.
>>> Click Here To Get Instant Access SPARK App Now <<<
Check Out My Previous Reviews: PromptBuddy Review, KdpBooksAI Review, Omega AI Review, NY BundleApps Review, and 100K Bitcoin System Review.
Thank for reading my “SPARK Review” till the end. Hope it will help you to make purchase decision perfectly
#sparkapp#sparkappreview#sparkappcoupon#sparkapphonestreview#sparkappfeatures#sparkappworks#whatissparkapp#sparkappreviews#buysparkapp#sparkappprice#sparkappdiscount#sparkappfe#sparkappoto#getsparkapp#sparkappbenefits#sparkappbonus#howtosparkappworks#sparkappsoftware#sparkappFunnels#marketingprofitmedia#sparkappUpsell#sparkappinfo#purchasesparkapp#software#traffic#sparkappexample#sparkappworthgorbuying#ai#aiapp#aitool
1 note
·
View note
Text
Cheap Website Hosting: How to Choose the Right Provider

Finding the right website hosting can feel overwhelming, especially if you’re on a budget. You want something affordable but also reliable. After all, the success of your website can depend a lot on the hosting service you choose. But here's some good news: cheap website hosting is not hard to find! The trick is knowing what to look for and what questions to ask. So, let’s break it down in simple terms.
Why Cheap Website Hosting Matters
When you’re just starting out with a website, whether it’s a blog, a small business page, or an online portfolio, you don't want to spend a fortune. That’s where cheap website hosting comes in. It allows you to get your website online without breaking the bank.
But there’s a catch. Not all cheap web hosting providers are created equal. Some offer amazing features for low prices, while others might cut corners. So, how do you pick the right one?
What to Look for in a Cheap Website Hosting Provider
Choosing a cheap website hosting provider involves more than just picking the lowest price. Here are a few things you should consider before making a decision:
1. Reliability and Uptime
Imagine this: you launch your new website, tell everyone about it, and then... it’s down half the time. Frustrating, right? That’s why reliability is key. The best cheap website hosting services will promise an uptime of 99.9%. In simple terms, this means your website will almost always be online. Look for reviews or user testimonials to see if a hosting provider lives up to their uptime guarantee.
2. Customer Support
Problems can pop up anytime. You might wake up one day, only to find your site has vanished. That’s when good customer support becomes your best friend. A quality cheap website hosting provider will offer 24/7 support, so you’re never left in the dark. Check if they have different support options like live chat, email, or phone support. Some cheap web hosting services might save costs by cutting back on customer support, but this can cost you more in stress and time if things go wrong.
3. Ease of Use
Not everyone is a tech wizard, and that’s okay! You don’t need to be a pro to run a website. That’s why it’s important to choose a hosting provider that offers an easy-to-use control panel. Most cheap web hosting companies use a tool called cPanel, which makes managing your site a breeze. It’s especially useful for beginners. If you’re hiring a cheap web designer, they’ll likely appreciate an easy-to-navigate hosting platform too.
4. Scalability
Starting small is great, but what if your website grows? Maybe your blog starts getting tons of visitors, or your online store takes off. Will your cheap website hosting provider be able to handle it? Look for hosting services that offer plans you can upgrade to as your website grows. This way, you’re not stuck with limited resources as your site becomes more popular.
5. Price and Hidden Costs
Cheap website hosting should be, well, cheap! But be careful. Some providers lure you in with a low price, only to surprise you with hidden fees later on. Always read the fine print. Check if the price you see includes necessary features like SSL certificates (which secure your site) or domain registration. Some cheap web designers might recommend hosting providers that appear affordable but end up costing more in the long run due to these hidden charges.
Free vs. Cheap Website Hosting: Is It Worth It?
You might be tempted by free website hosting. After all, what’s cheaper than free, right? But hold on a minute. Free hosting often comes with a catch. These services usually plaster your site with ads or limit your storage and bandwidth. Plus, your website might have a less professional web address, like “yourwebsite.freehosting.com,” which can look a bit amateurish.
In contrast, cheap website hosting—while not free—usually offers more control and better features. It’s a small investment for a more professional online presence. If you’re working with a cheap web designer, they’ll likely steer you toward a paid hosting option that fits your budget but still gives you the freedom to design the site you want.
Shared Hosting: The Best Choice for Cheap Website Hosting
If you're looking for cheap website hosting, shared hosting is often the way to go. This type of hosting means your website shares server space with other websites. It’s like renting an apartment in a building; you have your own space, but you share common areas.
Because resources are shared, it’s cheaper. But it does have a downside—if one website on the server gets a ton of traffic, it might slow down the others. However, for small websites or those just starting out, shared hosting is usually more than enough. It's what most cheap web designers recommend to their clients who want to save money.
The Bottom Line: Make an Informed Choice
Choosing the right cheap website hosting provider isn’t just about the price tag. Sure, you want something affordable, but it has to meet your needs too. The best cheap web design won’t mean much if your website is always down, slow, or riddled with hidden costs.
So, take your time. Compare different providers. Check reviews and make sure they offer good customer support. And remember, if you’re working with a cheap web designer Singapore, ask them for recommendations. They’ve likely worked with many hosting services and can point you in the right direction.
In the end, a little research goes a long way. Finding a reliable, cheap website hosting provider sets a solid foundation for your website. It’s an investment in your online success—without spending a fortune. Now go out there and find the perfect hosting for your website dreams!
0 notes
Text
Next-Level Management: Strategies for Effective cPanel Server Administration
In the ever-evolving landscape of web hosting, cPanel server administration stands as a cornerstone for efficient website management. We, as seasoned experts in the field, understand the pivotal role that effective server administration plays in ensuring optimal performance and security. In this comprehensive guide, we unveil advanced strategies that propel your cPanel server management to the next level, setting you apart in the digital realm.
1. Fine-Tuning Resource Allocation
Achieving peak performance demands a meticulous approach to resource allocation. We recommend conducting a thorough analysis of your server's workload, identifying resource-hungry processes, and then fine-tuning the allocation. Utilize cPanel's robust tools to adjust CPU, memory, and disk usage for each application, ensuring a harmonious balance that maximizes efficiency.
2. Caching Mechanisms for Speed
Speed is paramount in the online world. Implementing advanced caching mechanisms such as Opcode caching and Content Delivery Networks (CDNs) can significantly reduce page load times. These techniques enhance user experience, contributing to lower bounce rates and improved SEO rankings.
3. Regular Security Audits
In the ever-present threat landscape, regular security audits are non-negotiable. Conduct thorough assessments using cPanel's security features, ensuring all software, plugins, and configurations are up-to-date. Identify and rectify vulnerabilities promptly to fortify your server against potential breaches.
4. Two-Factor Authentication (2FA)
Enhance your server's security posture with the implementation of Two-Factor Authentication. By adding an additional layer of authentication, you fortify access control, thwarting unauthorized entry attempts. cPanel seamlessly integrates 2FA, providing a robust defense against potential security threats.
5. Automation for Efficiency
Efficiency is the hallmark of effective server administration. Leverage automation tools within cPanel to streamline routine tasks such as backups, updates, and resource scaling. Automation not only saves time but minimizes the risk of human error, ensuring consistent and reliable server management.
6. Effective Backup Strategies
A comprehensive backup strategy is your safety net in the digital realm. Implement regular backups using cPanel's Backup Wizard, ensuring both data integrity and the ability to swiftly recover in the event of an unforeseen incident. This proactive approach safeguards your website and valuable data.
7. Utilizing cPanel Logs
In the pursuit of excellence, adept troubleshooting is a necessity. Familiarize yourself with cPanel's extensive logs, including Apache, MySQL, and error logs. Analyzing these logs provides invaluable insights into potential issues, facilitating prompt identification and resolution.
8. Integration of Monitoring Tools
Proactive monitoring is the key to preventing issues before they impact performance. Integrate robust monitoring tools into your cPanel server, tracking resource usage, website traffic, and server health. Early detection empowers you to address potential problems swiftly, maintaining seamless operations.
In conclusion, mastering cPanel server administration requires a holistic approach that combines performance optimization, security fortification, efficient management, and advanced troubleshooting. By implementing these next-level strategies, you position yourself at the forefront of server administration excellence.
0 notes
Text
How to Set Up a WordPress SSL Certificate
Finding your way around the internet can be challenging, especially when keeping your online identity safe. Welcome to the world of SSL certificates, a significant security measure that is no longer a choice but a must-have for any serious website owner.
How to Set Up a WordPress SSL Certificate is a post that will walk you through this process.

What does SSL mean?
Safe Sockets Layer, or SSL, is a system that protects all of the data sent between a browser and a web server. It protects the information they send each other from hackers and other cyberattacks and keeps it private.
HTTPS stands for Hypertext Transfer Protocol Secure. It is the safest form of HTTP, the standard way to send data over the internet. The padlock in your browser's search bar tells you that the connection is an HTTPS connection that SSL encrypts. This adds an extra layer of security.
A "Not Secure" message in the address bar means that the website does not have an SSL certificate or has an expired or incorrectly set certificate. As a warning, this lets people know that hackers could steal any information they enter on the site.
What do you need to get an SSL certificate set up in WordPress?
Most of the time, your web host gives SSL keys to your websites. So, before you start:
Ensure your site still needs the SSL certificate you need to set up.
You should check to see if your web host:
Free SSL validation is offered.
Offers paid SSL certification as part of its hosting plans
Allows you to add SSL certificates from third-party providers
If your SSL certificate has expired or, very rarely, your WordPress site doesn't have one, you will need to add one.
2. Take a full site backup
Additionally, we suggest using a backup tool to make a copy of your WordPress site before installing an SSL certificate in WordPress. It's also easy to recover; you can set it to back up at regular times and more.
Websites that use WordPress can now get SSL certificates either by hand or with a tool. This article tells you how to install a third-party or self-signed certificate. The plugin is more accessible, but you should follow the other steps instead.
How to install an SSL certificate in WordPress using a plugin
Use a dedicated SSL plugin like Really Simple SSL to install free third-party certificates from Let's Encrypt on your WordPress site. This is especially useful if your web host does not provide an SSL certificate.
Step 1: Activate the Really Simple SSL plugin from the WordPress plugins section.
Step 2: Open the Really Simple SSL dashboard by navigating to Settings and SSL.
Step 3: Select the Install SSL Certificate option.
This displays the System Status pop-up, determining whether your website matches the minimum requirements for installing the certificate.
If there are no problems, click save and continue.
Step 4: Fill out the domain wizard with site information.
Most of the information in this part is pre-filled based on the previous step's system status check.
Once finished, click save and continue.
Step 5: In the Hosting area, provide your web host's URL and admin credentials.
Continue by clicking the Save button.
Step 6: In the directory pop-up, double-check the findings.
Simple SSL verifies your credentials at this step.
If there are no problems, click save and continue.
Simple SSL should now install an SSL certificate from Let's Encrypt on your WordPress site. Keep your credentials ready in case you are logged out of your site.
How to manually install an SSL certificate in WordPress (via cPanel)
To install SSL certificates on web hosting services such as MyResellerHome, use cPanel. Using cPanel to upload an SSL certificate is a reasonably easy operation, and its UI is nearly identical across web providers. The instructions outlined here apply to all cPanel’s and web hosting.
Getting an SSL certificate for WordPress is a recommended read.
Step 1: Go to the Security section of your site's cPanel and click on SSL/TLS.
Step 2: Select Generate, View, Upload, or Delete SSL Certificates.
Step 3: Fill out the Upload a New Certificate area with your certificate information.
Step 4: To add the certificate to your site, click Install after it appears in the Certificates on Server section.
How to Install an SSL Certificate in WordPress Using the Web Server
Obtain an SSL certificate from a CA and manually install it on your WordPress site using the mechanism required for your web server—Apache or nginx.
However, we do not suggest this strategy because it increases the likelihood of things crashing on your website. Furthermore, manual SSL installation is time-consuming and entails multiple procedures. It will necessitate changes to core files and the site database, where errors could be disastrous to your site.
After all that work, you'll have to manually redirect your site from HTTP to HTTPS, which is required for SSL installation.
The use of a plugin such as Really Simple SSL, which simplifies and expedites the process of installing SSL certificates on your website, allows you to avoid the risks that are associated with these situations.
What should I do after putting in an SSL certificate in WordPress?
After adding an SSL certificate to your WordPress site, you should check that it is set up correctly across the whole site.
Change your site's URL from http:// to https:// in the central part of your manager dashboard.
Add the https:// URL to your site's information. Use a tool like BetterSearchReplace (BSR) to make it easy and quick.
Once you've installed and activated the BSR plugin, go to your dashboard and click on "Tools" to get to the BSR homepage. Type the HTTP URL of your site into the Search for box and the https URL into the Replace with box. Uncheck the box next to Run as dry run, then click Run Search/Replace → to select all the tables.
Change your site's URL in Google Analytics, Google Search Console, and its sitemap to inform Google about the changes. This ensures that Google can find and show your site in search results.
Run your site's URL through the Qualys SSL test site to ensure that your SSL certificate is set correctly and that the results show that it is.
Check your site's license often to ensure it's renewed on time. This is very important so that you can handle expiring certificates since Google is slowly switching from SSL certificates that are valid for one year to ones that are valid for 90 days.
Extra safety steps to keep your WordPress site safe
Adding an SSL certificate to make your WordPress site safer is only the beginning. It only encrypts the traffic going to and from your site. It doesn't protect it from the many threats that are out there. Because of this, you must take extra steps to keep your site safe from all kinds of dangers.
Add a security tool to your site and your SSL certificate. Because it has a strong firewall and good bot protection, it keeps your site safe from threats, and its malware scanning and removal tools always ensure it stays clean.
Tell people to change their passwords often and ensure they are strong.
Use two-factor authentication (2FA) or other vital security steps to make your login safer.
Check user accounts and permissions often to prevent people from changing your WordPress site without your permission.
Bots and people who aren't supposed to be there can't start brute-force attacks if you limit the number of times people can log in to your site.
Regularly update your WordPress core, plugins, and styles to prevent people from exploiting any security holes.
How to fix problems with the SSL installation on your WordPress site
Some things might get in the way of you adding an SSL certificate to your WordPress site to make it safer. Don't worry, though. We will discuss some of the most common problems that might arise during this process and how to solve them.
You might be getting one of these errors: HTTP 429.
That's too many requests; more domains should be allowed, or the certificate must suit your chosen domain. They show up when the SSL certificate information doesn't match what's on your WordPress site. If you need any corrections in your SSL certificate information, get a new one from the CA.
Do you get a warning message that says "Expired SSL Certificate"?
You guessed it—an SSL certificate that has expired—is the root of this issue. If you just installed an SSL certificate and now see this error, check the times the certificate was activated and when it expires. This mistake usually happens because the date is wrong or not likely to happen. Also, since Google is moving toward SSL certificates that are good for 90 days, you must check your site's expiration dates and ensure you renew them on time.
Are you getting an error that says NET:ERR_CERT_INVALID or NET:ERR_CERT_COMMON_NAME_INVALID?
If you see this error, your browser thinks the SSL certificate for your WordPress site is inaccurate. There are many reasons for this, but the most common ones are wrong domain names or times of activation or expiration. Check these facts and have the CA fix them when they reissue your certificate.
Are you getting an ERR_SSL_PROTOCOL_ERROR or an ERR_SSL_VERSION_OR_CIPHER_MISMATCH error?
An incorrectly set-up or written SSL certificate, a problem with the certificate's digital signature, or an outdated encryption algorithm could all be to blame for this error. You should go back and fix any mistakes in your SSL settings.
If the issue still appears, try a fresh copy of your browser or a different browser to see if that fixes it. There are other things that the Qualys SSL test can tell you about your SSL certificate. Make sure that the SSL certificate is not affected by a firewall plugin by turning it off and then reloading the website. The worst-case scenario is that you might be required to obtain a new certificate.
Are you getting "Not Secure" messages on your site or login page?
If your browser tells you that your WordPress login page or site is "Not Secure," it means that your browser can't find an SSL certificate or, if one is there, it has expired or isn't set up correctly. You can get a new SSL certificate or use a tool like Really Simple SSL to fix the one you already have. Next, you need to change all HTTP URLs to their HTTPS versions and move them. Lastly, clear your browser's files and let Google know your site has changed.
Conclusion
Setting up a WordPress SSL certificate ensures that your website is safe and trustworthy. In addition to keeping your information secure, it also helps your site's SEO rankings. You might think the process is challenging at first, but if you carefully follow the steps in this piece, you can do it. Remember that a safe website builds trust among users and makes surfing more enjoyable. Be sure to add an SSL certificate to your WordPress site.

Janet Watson MyResellerHome MyResellerhome.com We offer experienced web hosting services that are customized to your specific requirements.
Facebook Twitter YouTube
0 notes
Text
Easy TYPO3 installation: Manual & Composer methods!
TYPO3 is the most secure, fast and robust CMS that is powered by easy installation which makes it easy for anyone to create a website. Leading TYPO3 web hosting providers facilitate quick and straightforward TYPO3 installations, typically requiring less than five minutes to set up.
In this Step by step Tutorial We are looking into how to install TYPO3 Manually and Via Composer .
Let's Look How?
System Requirement for installing TYPO3
It's essential to ensure the proper prerequisites for CMS installation are in place.
This process primarily necessitates two key components: a web server and a database server.
Operating System : Linux, Windows or Mac, or cloud infrastructure
Web Server : Apache httpd, Nginx, Microsoft IIS, Caddy Server ,
Supported Browser : Chrome (latest) , Edge (latest) , Firefox (latest) , Safari (latest)
Composer Requirement : Composer >= 2.1
Database : MariaDB >= 10.2.7 <= 10.5.99 Microsoft SQL Server MySQL >= 5.7.9 <= 8.0.99 PostgreSQL SQLite
Hardware Requirement RAM >= 256 MB
PHP Version Support PHP >= 7.4.1 <= 8.1.99
How to Install Via Composer
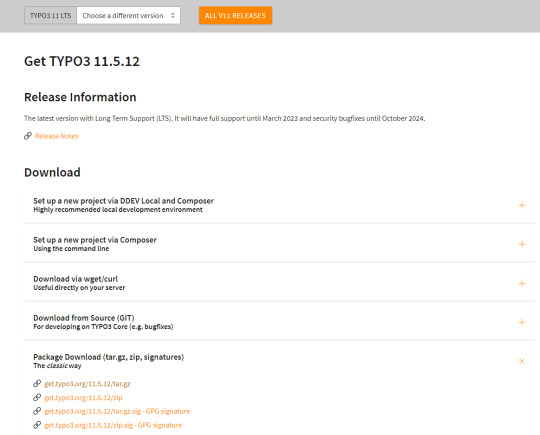
Step 1 Download TYPO3 From Website
The first step involves obtaining TYPO3 from its official website. You can acquire your preferred TYPO3 version from there.
2. Configure the Installation Files
Following Steps can be followed to setup the installation file of TYPO3.Begin by extracting the TYPO3 Zip file that you downloaded from TYPO3's official website. This will create a folder on your system containing all the necessary files for TYPO3.
Next, transfer these items to the server's designated folder Further , it is critical to decide the installation location for TYPO3. If you intend to Access it through main domains , this means you will need to Upload TYPO3 Files directly to public_html/ directory of your account..
However, if you have a different setup in mind, the location may vary accordingly.
there two different ways to transfer your records first is Utilising an FTP or second way of directly through cpanel account.
3.Initiate the Installation Process
To begin the installation process, generate a file named 'FIRST_INSTALL' within the same directory where you've uploaded your TYPO3 files.
This serves as a security checkpoint that grants permission to proceed with the installation. You can create this file using FTP or utilise the File Manager in your cPanel account.
4.Verification of System Requirements
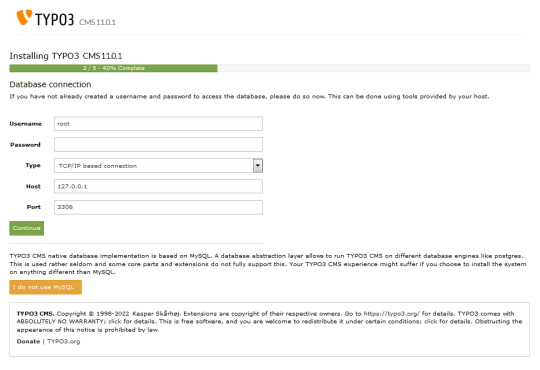
To access the TYPO3 installation wizard, visit
“ https://www.MY_INSTALL.com/typo3/install.php." This tool is designed to facilitate the TYPO3 installation process, which consists of five phases.
In the initial phase, the tool conducts a thorough examination of your system environment. If any issues arise as a result of system settings, you can utilize the troubleshooting function to address them. If no problems are detected, you can continue with the installation process.
5.Configuring TYPO3 Setup
For Configuring TYPO3 Setup You can follow this steps :
You'll integrate the MySQL database. Log in using the username 'root,' and note that no password is necessary when using the XAMPP installer.
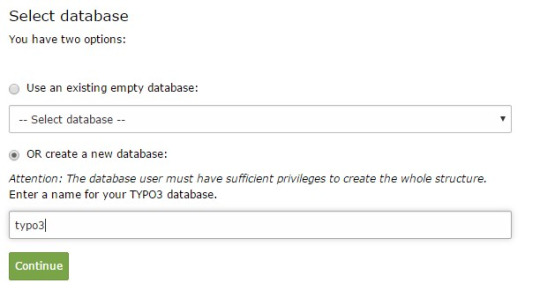
Next, you can either select an existing database or create a new one It's worth noting that you now have the option to use a different database implementation other than MySQL.
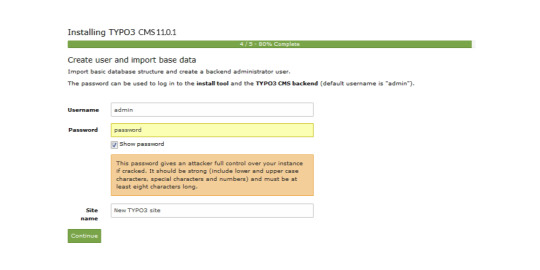
Next, you'll create an admin user for the TYPO3 backend. The password you set for this user will also be utilised for the install tool.
Now the installation itself is completed.
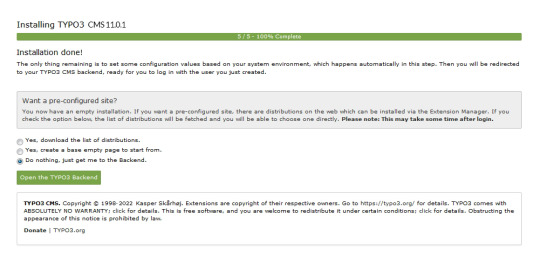
Lastly , the installation wizard finalises by automatically adjusting certain configurations to match your system environment.
However , You still have the option to choose whether TYPO3 will create an empty website or remain inactive temporarily.
By selecting 'Open the TYPO3 Backend,' you'll access the admin area, where you can log in using the account you just created.
Congratulations ! You have Completed and installed TYPO3 manually .
Install TYPO3 Via Composer Mode
For detailed instructions on installing TYPO3 using Composer, you can find a comprehensive step-by-step guide here: How to install TYPO3 - Manually & Via Composer
0 notes
Link
0 notes
Text
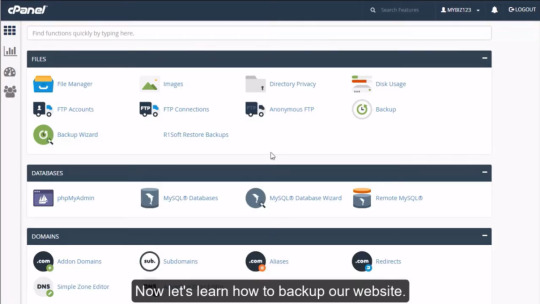
How to backup your website in cPanel
How to backup your website in cPanel
We assume you’ve already logged in to cPanel, and are starting on the home screen. Now let’s learn how to backup our website. Click the Backup Wizard icon. This is the main backup screen where you can backup or restore the files in your hosting account. To backup your website, click the Backup Button. You have the only option of backing up part of your account or generating a full backup, which…
View On WordPress
0 notes
Text
Live Support Chat Nulled Script 5.1.3

Unlock Real-Time Customer Engagement with Live Support Chat Nulled Script Looking for a powerful, real-time communication solution for your website? The Live Support Chat Nulled Script is the ultimate tool to boost user satisfaction and convert casual visitors into loyal customers. With seamless integration, robust features, and complete customization options, this nulled script gives you the edge of professional-grade live chat without the hefty price tag. What is Live Support Chat Nulled Script? The Live Support Chat Nulled Script is a feature-rich, real-time live chat system designed for businesses, startups, and agencies that want to provide instant customer support. This PHP-based solution is ideal for integrating directly into your website and allows your support team to chat with users, resolve issues, and convert leads — all in real time. Since this is a nulled version, you get complete access to premium features without any licensing restrictions or costs. Why Choose the Live Support Chat Nulled Script? Today’s digital consumers expect immediate responses, and this is where live chat becomes a game-changer. With the Live Support Chat , you’ll provide seamless support, monitor user activity, and increase customer satisfaction. No need to pay extra for live chat services — this nulled solution delivers high-end results for free. Technical Specifications Platform: PHP-based, compatible with all modern browsers Database: MySQL Responsiveness: Fully responsive and mobile-friendly UI Security: Role-based access control, chat encryption support Customization: Easy branding and UI modifications via built-in panel Key Features and Benefits Real-Time Messaging: Engage visitors with real-time conversations to resolve queries instantly. Multi-Agent Support: Allow multiple support agents to assist different users at once. User Monitoring: Track visitor movements, pages visited, and time spent on site. File Sharing: Securely send and receive files during chat sessions. Chat Transcripts: Save and review chat histories for quality and training purposes. Offline Messaging: Capture user inquiries even when your team is offline. Custom Alerts: Notify agents of new visitors, messages, and support tickets in real-time. Who Should Use This Script? The Live Support Chat Nulled Script is perfect for: E-commerce Websites: Help customers instantly with product queries and order assistance. Agencies: Provide immediate consultation and project updates to your clients. SaaS Platforms: Offer technical support without expensive third-party tools. Educational Platforms: Answer student queries and boost engagement. Easy Installation and Setup Guide Download the Live Support Chat Nulled Script from our secure platform. Upload the files to your web hosting account using FTP or cPanel. Configure the database settings by updating the config file. Run the installation wizard to finalize setup. Customize the chat interface to match your website branding. You don’t need to be a developer to get started. With detailed documentation and a user-friendly interface, this nulled script can be set up in minutes. Frequently Asked Questions (FAQs) Is it safe to use the Live Support Chat Nulled Script? Yes, the script is thoroughly scanned and tested for security vulnerabilities. Just ensure your website hosting is secure, and you’re good to go. Can I customize the interface to match my branding? Absolutely! The script includes a built-in customization panel where you can modify colors, fonts, logos, and more. Does it support multiple languages? Yes, the Live Support Chat is fully translation-ready, making it perfect for multilingual support environments. Can I use this script with WordPress? While it's not a native WordPress plugin, it can be easily integrated into any WordPress site using custom pages or widgets. Get More With Our Collection of nulled plugins Why stop at live chat? Explore our vast library of professionally nulled plugins to supercharge your site without spending a dime.
Whether you need SEO tools, backup systems, or security add-ons, we’ve got you covered. Need more advanced tools? Check out UpdraftPlus Premium nulled for hassle-free backups and restoration solutions at zero cost. Final Thoughts The Live Support Chat offers a reliable, scalable, and cost-effective way to provide instant customer service. Whether you’re a small business or a growing enterprise, this script has everything you need to support your users 24/7 — without draining your budget. Download it today and transform your customer experience forever.
0 notes
Text
Business Shared Hosting | Web Hosting Solutions | Limenetworking Hosting
Meaning Of Business Shared Hosting?
Business Shared Hosting is a well known, economical, passage level web hosting item, frequently appealing for little and medium organizations, web journals, portfolios and websites with moderate measures of traffic.

With Shared Web Hosting, numerous websites share an enormous server and its assets, including capacity, transfer speed, and plate space. With Shared Hosting, the web have is answerable for the entirety of the server support and upkeep. All of Limenetworking Business Hosting packages are cheapest Shared Hosting packages.
Reason of Choosing Business Shared Hosting
Business Shared Hosting is an extraordinary, modest alternative when you’re simply beginning. In the underlying phases of propelling a web nearness, or reviving what you have, until your website gathers speed, choosing the most reduced estimated alternative is a brilliant business choice. On the off chance that you needn’t bother with explicit programming or setups, at that point Business Shared Hosting is ideal for you.

Some installable programming requires root get to – which gives the client access to all assets and execute any order – or more CPU use than permitted on Business Shared Hosting. When beginning, most independent ventures just need a little instructive website to help construct mindfulness and support leads.
Cheap Web Hosting
While most independent companies first dispatch a website, traffic will presumably be low until the webpage increases rank on search engines.
Advantages of Business Shared Hosting
Limenetworking Web Hosting offers numerous advantages with our Business Shared Hosting packages. These advantages incorporate free SSD drives, a free disk space for one year, along with restoration and backup facility with single click. There are more than 300 single click installers accessible, and you can code in different languages, for example, PHP, MySQL, .net, and Ruby.
You can get to your email from any gadget with Limenetworking protected IMAP email and pick your server farm that will permit you to have your maximum speed zone. You can work simpler and quicker with SSH access, and you can appreciate the Google applications mix with a simple to utilize 3-advance wizard.
Choosing Best Web Hosting Product
If you are new to web hosting or are making a website with low to direct measures of traffic, Business Shared Hosting is likely the best alternative for you. It is the most reasonable web hosting you can purchase and will probably have all that could possibly be needed assets for your site(s) to run rapidly and efficiently.
When your site develops in rush hour gridlock and your experience increments in utilization, it will be a great opportunity to move up to Virtual Private Server Hosting. This item will give you your own segment of a dedicated server.
Limenetworking Cheap Dedicated Servers
If you have an asset overwhelming application or a site with an exceptionally high measure of traffic, you have the choice of overhauling. You can move up to your Limentworking cheapest Dedicated Server which gives all of you of the server assets and permits you to arrange it any way you see fit.
Building a Website
Limenetworking Web Hosting makes it simple for new web designers to get their locales up and off the ground. The entirety of our Business Hosting plans accompany Softaculous, an application installer that will permit you to download more than 400 applications to assist you with your website.

Limenetworking Web Designing
These applications incorporate, however are not constrained to, Content Management Systems (CMS, for example, WordPress, Joomla and Drupal, Online Marketplaces, for example, Prestashop, Magento and OpenCart, and numerous others. Shared Hosting is an ideal domain to create and sharpen your programming aptitudes and gives various instruments to novices.
I as of now have a website with another host. Would i be able to transfer my website?
Yes, you can move your website for nothing to your Limenetworking Web Hosting account. Your free website move incorporates up to 3 websites, databases, as well as cPanel accounts. The expense for extra website moves is $10 per thing. On the off chance that you decide to move your website, we have a far reaching bolster focus. Investigate your issues with broad bit by bit articles, training channels, and client driven network support forums.
How numerous websites would i be able to have with my Business Shared Hosting plan?
The number of websites you can have with one record relies upon the Business Shared Hosting plan you select. For Launch plans, you will be designated 2 websites for your account.
For Power plans, you can have up to 6 websites. With our Pro arrangement, you can have a boundless number of websites. No shrouded expenses or shock charges, only different websites for one low price.
What’s next subsequent to buying a Business Shared Hosting plan?
You are prepared to begin assembling your website(s). When you have bought your cheapest Business Shared Hosting bundle, sign into AMP and investigate alternatives, for example, enlisting and moving areas, getting to cPanel, buying SSL endorsements, setting up your email, submitting website move solicitations and much more.
You can likewise sign in to cPanel and start introducing applications, for example, WordPress. We have various instruction channels identifying with getting your record set up. In the event that you run into issues, don’t stop for a second to connect with our accommodating care staff for help.
Cpanel Login

Also, make a point to look to Limenetworking 100+ Small Business Resources and Tools for Entrepreneurs and Startups to help with showcasing, visual computerization and venture the executives devices. It’s a free asset direct for anybody hoping to streamline their website’s performance.
#cheap dedicated server#cheap dedicated hosting#vps hosting#vps#domain checker#business hosting#business web hosting#business shared hosting#$1 hosting#$1webhosting#managed dedicated server
3 notes
·
View notes
Text
WordPress Blog Backup Guide To Avoid Disaster
New Post has been published on https://wp.me/p36zjk-3X
WordPress Blog Backup Guide To Avoid Disaster
WordPress Blog Back up for Beginners
One thing that I always am looking to do is to back up my work, and Cpanel Back up is a very good tool to do this and it’s FREE. Heaven knows that when you work so hard on a project and especially all those blogs, you want to know that they are kept and in a safe place. That’s the reason I created this WordPress blog back up guide. It will keep your blog or website safe from ultimate disaster.
The first step is – like in anything the step that decides if you’re going to be successful or not. This is because you are going to be doing some planning.
I know…
Planning is a bad word in some circles. However, if you want success you need to know a few things when it comes to performing your blog back up.
Step 1 – Planning Your WordPress Blog Back Up
Decide what you want your WordPress blog back up to encompass and then plan where you want to store this backup.
If you’re going to store it online for instance, in a place like Dropbox, Box, or iCloud. Perhaps you thought about storing it locally on one of your hard drives.
NOTE: There is a risk as with all backup solutions. Storing things at home is close to the worst solution though. But if it’s all you have. Do it. No solution is FAR WORSE than backing up on a hard drive at home.
Step 2 – Setup
Now that you have your plan on where you are going to put your WordPress Blog backup, it is now time to start that plan. Now, if you haven’t done so yet, go ahead and login to your Cpanel. You will then search for the area that looks similar to a section like this:
[su_divider top=”no” divider_color=”#38459c” size=”7″ margin=”20″]
Are You Ready For Blogging Greatness?
Sign up for my 4 part mini email course.
Blogging is an excellent way to make a name for yourself in business. Sign up and I’ll show you how to build business cred, with smart branding and money making strategies for your blog.
Frist Name
Email Address
I understand and agree to the email marketing terms & conditions.
[su_divider top=”no” divider_color=”#38459c” size=”7″ margin=”20″]
Select the Backup Wizard.
After clicking on the backup wizard icon – for me, it’s under the “Files” tab – you will be prompted with “Do you want a full or partial backup done”. This is where you are going to refer to your plan and tell it to do what you planned to do.
For the sake of this post, I will just go through the full backup with local storage. (select full backup).
While doing this you want to make sure that everything is working properly on your website, so that in the event that you are in a position to restore your website/blog, you will have a working version of your blog.
If you are running a mac, you could even run apple script to do this for you on a weekly basis or monthly basis. This all depends on the frequency you post blogs. However, when you run a business on the internet, one of the first rules is to be consistent with your blog posts – and that means a daily basis if you want to start ranking and getting better at blogging.
Step 3 – Time to Start Your Backup
Select Home Directory.
this will backup your website to a directory on your server (which is your website), and when it’s complete you will receive an email at the address you list on the same form when everything is complete.
Step 4 – Download Your Blog Backup
You can now download your WordPress blog back up to your hard drive for safekeeping. This will be the second location aside from your hosting services that will save your backup.
If you’re ready to get a setup that is backed up automatically, and comes with tools to market your business, check out this website for a complete review.
If the preceding instructions on backing up a website was more than you would like to deal with and just want the convenience of owning your information. Try setting up a blog on WordPress.Org. Now, if you don’t want to deal with all the “techie” background work that is associated with owning a domain, then a decision to buy a blog with those features is in order. You can do that by selecting a managed WordPress solution with GoDaddy.
If you’ve successfully implemented this you know how time-consuming this is to do on a consistent basis. Not to mention taking time to blog each day, week, or month. The time for tasks just add up and soon there’s no more time left over to do the things you want to do in your “spare” time.
This is why I have moved my blog over to a hosting solution with GoDaddy. They offer a 30 day back up solution. You can get parts of your blog restored. Files, Databases, or both. Or all of it based on the day if it’s not older than a month.
Currently, GoDaddy is running a special on their Managed WordPress hosting for just $1/month.
[su_button url=”https://jonmccaw.com/GodaddyWordpress” target=”blank” style=”glass” background=”#B37C57″ color=”#ffffff” size=”9″ wide=”yes” center=”yes” icon_color=”#aebad9″ id=”marketing_affect”]GET YOUR MANAGED WORDPRESS HOSTING[/su_button]
By the way, this is part of the hosting package benefits. If you’re ready for amazing, American based hosting, then you will feel very comfortable selecting GoDaddy as your host. If you want more information on hosting and setting up a blog. Go check out my post about starting a WordPress blog.
0 notes
Text
Siteground cpanel hosting review
Finding the right web hosting provider has grown more difficult in recent years because of the glut of companies out there ready to make big promises, collect your checks, and then under deliver. Siteground woocommerce and other hosting companies like it know there is still a competitive advantage to be had in the marketplace by delivering on promises and offering dozens of benefits that add to the experience long after you have committed to their product. A web hosting company can literally make or break your website, and teaming up with the wrong kind will have you pulling your hair out and possibly too frustrated to go on. However, if you stick to sites like Siteground, which employ the following, you should always have the level of quality service that you need in a provider. For starters, you need to be able to reach someone with your questions, comments, and concerns, any time of the day or night. With many hosting providers keeping the same hours that your employers do, it can be difficult to work on your website or online business unless you are already doing it full-time. Unfortunately, this is not possible for many Internet entrepreneurs starting out. Siteground and some of the other veteran companies out there post customer service professionals at your beckon call any time of the day or night. If you have any technical issues or questions with regard to the service, billing-virtually anything-then you can get answers through an online chat service, email, or a phone call. But basic questions of functionality can often be taken care of through the use of an intuitive control panel, or cPanel. Cpanel hosting allows you to make most of the key decisions with regard to how your site looks and operates. Since it is so easy to work with, many site owners and online business professionals can forgo the hiring of a technical wizard to make updates and upgrades to the site. This places more control and a better sense of understanding in one's own hands and enables the creation of a website one can truly be proud of. While the cPanel is one of the most important aspects of finding the right web hosting company, sites like Siteground go one step further and allow users to pay for unlimited access to data storage, domain purchasing, and transfer rates so that a site will never become a victim of its own success. By taking care of this upfront, there will never be any question as to whether or not your site(s) can handle the demands of a bump in traffic. You can also manage all sites through one service, thus streamlining your business and making it easier to achieve success in the online marketplace.
1 note
·
View note
Text
How to create a MySQL database in cPanel
How to create a MySQL database in cPanel
We assume you’ve already logged in to cPanel, and are starting on the home screen. Now let’s learn how to create a MySQL database. Click the MySQL Database Wizard icon. Enter a name for the new database, then click Next Step. Now we have to create a user for this database. Enter a username and create a password, then click Create User. Click the All Privileges checkbox, then click Next…

View On WordPress
1 note
·
View note
Text
How to Host WordPress Website From Localhost to Server
How to Host WordPress Website From Localhost to Server Before you can move your WordPress website from localhost to server, you'll need to change the link structure of the content files. By default, WordPress URLs start with https://localhost/. This means that you'll need to change the link structure to match your live server installation. Duplicator plugin The Duplicator plugin for hosting a WordPress website from localhost to server will automate the process of setting up a WordPress site on a new server. After installing the plugin, the WordPress dashboard will show a Duplicator section. If there are no packages yet, click the Add Package button. A download archive and installer file will appear. Once you download it, you can follow the installation instructions. The Duplicator plugin backs up your entire site, including all files, plugins, themes, pages, posts, media, and media. The plugin can create an archive of your website as a zip file. If you choose the wrong archive, your site will not be restored. XAMPP The first step to host a WordPress website on a server is to install the WordPress application on the hosting server. To do this, you need to download the latest version of WordPress from WordPress.org and manually unzip it into the XAMPP folder. Once the program has finished installing, you can create a database and folder to store your website data. XAMPP is a free web application package that runs on all operating systems. It has different versions for Linux, Mac OS X, and Windows. Once you download and unzip the XAMPP file, follow the installation instructions. In some cases, XAMPP will prompt you to select which Windows version you want to run, although this is generally not necessary if you're using the program on a Windows computer. If you're using a Mac or Linux computer, you can also use XAMPP to host your WordPress website. phpMyAdmin First, you'll need to start the Apache Web Server and MySQL Database. Once you've done that, open up phpMyAdmin by going to localhost/phpmyadmin. You'll see a list of all the databases and URLs for your WordPress website. Now, you need to import your database from your localhost to your server using phpMyAdmin. To do so, you'll need to open phpMyAdmin and navigate to your hosting account's control panel. Once you've launched the program, you'll see a list of database names. Choose the one you want to import and click Export. Then, you'll need to create a new database in your new hosting account. Note that some hosts disable the ability to create databases using phpMyAdmin, so it's best to check with your hosting provider before you try this. cPanel To host a WordPress website on a server, you'll first need to create a MySQL database. If you already have one, you can skip this step. If not, you can create a new one by using the MySQL Database Wizard. You'll find this wizard in the Databases section of your cPanel dashboard. Click on the "Create a new database" icon, and enter a name for it. After that, the wizard will create a new database for your WordPress site. You'll also need to know how to install FTP on your computer. FTP is a file transfer protocol. You can use it to transfer files to and from your server. WordPress Installing WordPress on a localhost can help you get started with building your site without the need for a user server. It also allows you to test customizations and settings before transferring them to the live server. In addition, you can use it to test any third-party tools, plugins, or themes before committing them to a live server. The first step is to open phpMyAdmin and navigate to the root directory of your local WordPress website. This directory contains your wp-admin and wp-includes files. Once you have the files you need to move your site to the remote server, upload them there. These files will replace their counterparts on the remote server. permalink structure Moving your WordPress website from localhost to server is an excellent option for building many different sites without the need for an internet connection. It also allows you to test new settings and customizations, including the WordPress core installation, plugins, and themes, without affecting your live website. This way, you can identify any conflicts or issues before transferring your changes to your live site. The first step to move your WordPress website from localhost to a live server is to get an account with a web host. This will allow you to upload your website from localhost to the live server in a few steps. In order to do this, you will need a web hosting account, a domain name, and an FTP program. You should already know how to use an FTP program, such as FileZilla or WinSCP. DNS name If you are creating a WordPress website locally, you need to change the DNS name of the site to point to the server. You can do this on your computer. This will make your site available to everyone. After you've changed the DNS name, you can go live! Follow these instructions to move your WordPress website. You can also use cPanel to move your site. If you're using IPv4, you can use the localhost DNS name. If you're using IPv6, you'll want to use the server name. The localhost name resolves to 127.0.0.1, which is a reserved top-level DNS name. This allows developers to test their sites without causing any unauthorized changes. How to Host WordPress Website From Localhost to Server Read the full article
0 notes
Text
ZOOK Email Backup Wizard Portable it is very important for email marketing. Because it makes a backup of all your email contacts. You can also back up emails from around 40 online email services. Like from Gmail, Office 365 and Outlook.com to Yahoo Mail, Zoho Mail and other alternative sites. Characteristics: You can create a backup of emails as technical files Maintains the original folder hierarchy. You can migrate the email backup to a different mailbox. You can use bulk backup for your emails. You can backup emails as IMAP. It has a multilingual application. You can use filters to back up emails. You can also create a cPanel email backup. Release year: 2020 Version: 9.2 System: Windows® XP / Vista / 7/8 / 8.1 / 10 Interface language: English File size: 28.57 MB Format: Rar Execute as an administrator: There's no need
0 notes
Text
InfixEdu School Nulled Script 8.2.2
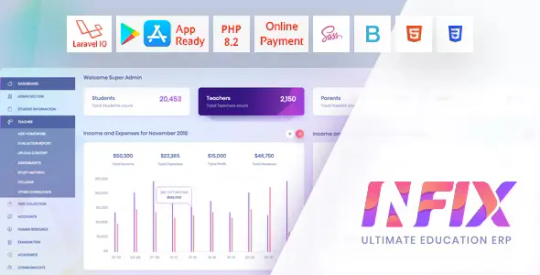
Unlock Academic Excellence with InfixEdu School Nulled Script Managing educational institutions has never been more streamlined and efficient. InfixEdu School Nulled Script offers a comprehensive, user-friendly platform tailored for schools, colleges, and universities aiming to digitize their academic and administrative operations. Whether you’re handling class schedules, exams, student records, or online communication, this powerful script delivers all the tools you need—without the hefty price tag. What is InfixEdu School Nulled Script? InfixEdu School is a fully-featured academic management system that empowers schools to operate in a digitally enhanced ecosystem. Designed for administrators, teachers, students, and parents, this script offers seamless coordination between different roles while reducing manual workload. With this nulled version, you can download, install, and experience all the premium features—absolutely free. Technical Specifications Framework: Laravel 8+ Database: MySQL 5.6+ Server Requirements: PHP 7.3+, Apache/Nginx Responsive Design: Fully mobile-optimized UI Languages Supported: Multilingual support including RTL languages Top Features and Benefits Student Information System (SIS): Easily manage student records, attendance, grades, and ID generation. Timetable & Exam Management: Automate scheduling for classes, exams, and events with intuitive calendar integration. Online Fee Collection: Integrated payment gateways for effortless fee tracking and management. Homework & Communication Tools: Teachers can assign homework and communicate directly with students and parents. Library & Inventory Management: Keep track of educational resources and supplies with real-time updates. Integrated HR & Payroll: Manage staff payroll, attendance, and leave requests all in one place. Why Choose InfixEdu School Nulled Script? Unlike costly academic systems, InfixEdu School offers premium-level features without financial commitment. It’s ideal for schools that want to go digital but need to keep costs minimal. Its elegant design, fast performance, and flexibility make it a standout option for institutions of any size. Use Cases Private Schools: Simplify day-to-day operations from enrollment to exams. Public Institutions: Manage large student databases and improve parent-teacher engagement. Tutorial Centers: Use it for class scheduling, result publishing, and student tracking. Online Learning Platforms: Enhance your digital course delivery with structured academic tools. How to Install InfixEdu School Nulled Script Download the InfixEdu School Nulled Script ZIP package from our website. Upload the files to your server using FTP or cPanel. Configure the .env file with your database credentials. Run the installation wizard and follow the on-screen steps. Login to the admin dashboard and begin customizing your settings. Our platform also offers other top-notch nulled plugins that can enhance your WordPress ecosystem. Frequently Asked Questions (FAQs) Is it legal to use InfixEdu School Nulled Script? While nulled scripts should be used responsibly, our version is intended for educational and testing purposes. We encourage you to evaluate the script thoroughly before considering a licensed copy. Does the script include all premium features? Yes, you get full access to every module and premium functionality present in the official version—without paying a dime. Can I integrate other plugins with this script? Absolutely. In fact, we recommend using popular tools like Slider Revolution NULLED to boost your site’s visual appeal and performance. Is support available for the nulled version? Official support may not be available, but our community and tutorials can help you resolve common issues. Conclusion InfixEdu School Nulled Script is your gateway to building a smarter, more efficient academic environment. With its robust suite of tools and zero-cost access, there’s no better time to digitize your educational institution.
Download it now and experience the future of school management—today.
0 notes